Handmade Udon Noodles
Hand‑kneaded udon delivers a uniquely chewy, springy bite that machine‑made noodles can’t quite match. A blend of 00 pizza flour and tapioca starch gives the dough its signature elasticity, while the traditional foot‑kneading method develops strength without overworking it. After a long rest, the dough rolls out smoothly and cuts cleanly into thick, satisfying strands perfect for hot broths, stir‑fries, or chilled dipping dishes.
Cook's notes
Flour combination is intentional. 00 flour provides structure and smoothness; tapioca starch adds bounce and chew. Foot‑kneading is practical, not gimmicky. The weight of your body develops gluten more efficiently than hands alone. Keep the dough wrapped to prevent sticking. Fresh vs. frozen. Fresh noodles cook in about five minutes; frozen ones go straight into the pot with just a little extra time. Serving is flexible. Udon works beautifully in hot soups, stir‑fries, or chilled preparations like zaru udon.
Ingredients
- 0.5 cup (118ml) warm water
- 1 oz (28g) tapioca starch
- 9 oz (255g) 00 pizza flour
- 1.5 tsp (7ml) fine sea salt
Instructions
- 1
Combine tapioca starch, 00 pizza flour, and fine sea salt in a mixer bowl.
- 2
Attach a dough hook to the mixer. Gradually drizzle in half a cup of lukewarm water while mixing, scraping the sides as needed, until a shaggy dough forms.
- 3
If the dough is too dry, add one to three tablespoons of water, one tablespoon at a time, until it forms a loose ball. Expect a firm dough. Udon dough starts dry and tight—add water sparingly to avoid soft, gummy noodles.
- 4
Knead the dough on low speed for five minutes.
- 5
Place the dough ball in a loosely sealed Ziploc bag or wrap it in cling film, cover it with a kitchen towel, slip on clean socks, and gently knead it with your feet until it’s flattened.
Tip: This step helps develop the dough's texture
- 6
Fold the dough into quarters, cover, and repeat the kneading process three to four times until the dough is soft and smooth.
- 7
Cover the dough completely, pressing out as much air as you can if you’re using a Ziploc bag, and let it rest at room temperature for three to six hours, or refrigerate it overnight. Resting transforms the dough. A long rest relaxes the gluten, making rolling easier and improving texture.
Tip: Bring refrigerated dough to room temperature for one to two hours before rolling.
- 8
Divide the dough into two pieces and flatten each into a rectangle about three-quarters of an inch thick. Lightly dust with flour.
- 9
Roll the dough by hand or use a pasta roller to take each piece from setting one to setting two.
- 10
Cut the dough into noodles by hand or with a noodle cutter, adjusting the width to your preferred thickness. Thicker noodles give a hearty chew; thinner ones cook faster and feel lighter.
- 11
Boil the noodles in a large pot of gently boiling water for five minutes or until they float and reach the desired texture.
Tip: Stir occasionally to prevent sticking.
- 12
To freeze, spread uncooked noodles on a floured cookie sheet and freeze for six to 12 hours, then transfer to a freezer bag.
Tip: Cook frozen noodles directly, adding one to two minutes to the cook time.
To Serve
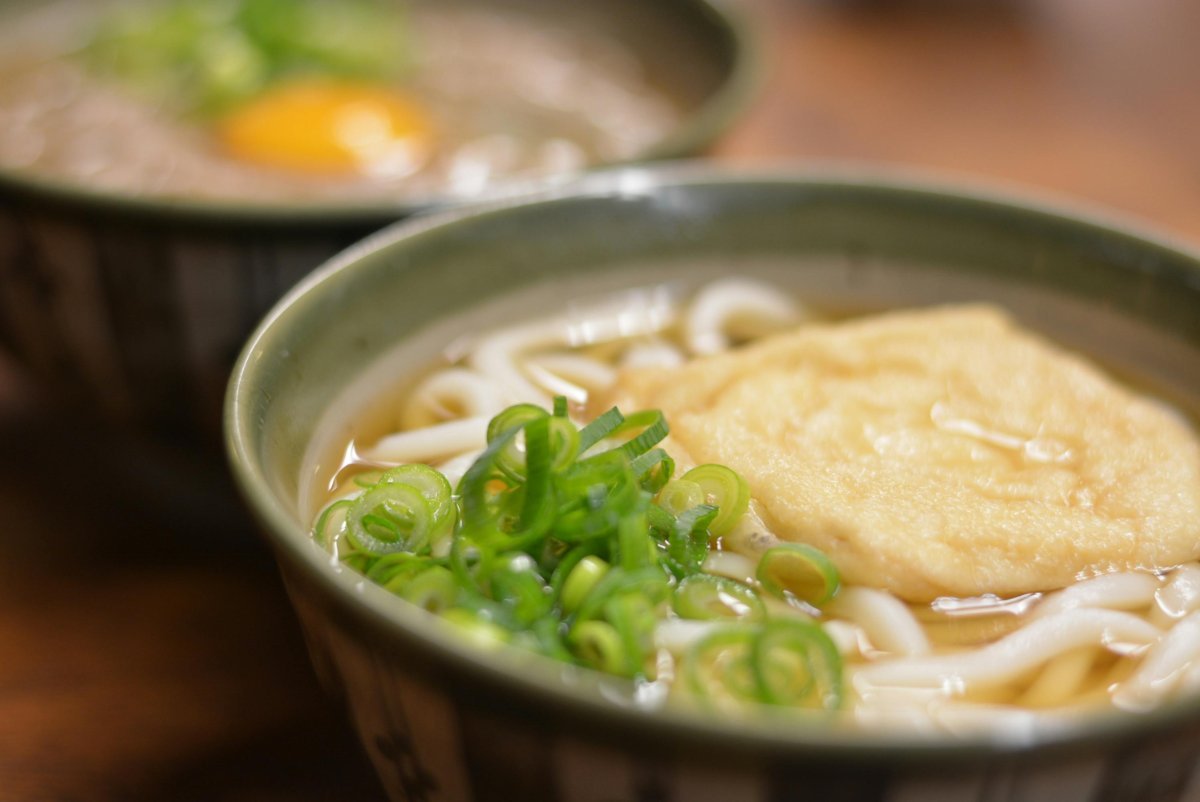
13Enjoy the fresh udon in a simple hot dashi broth topped with your favorite garnishes — sliced scallions, grated ginger, nori, tempura bits, and/or a soft‑boiled egg. You can also serve the noodles chilled with a dipping sauce (mentsuyu) for a lighter option.
Minsuri
Save this recipe — and start your family cookbook.
- Add any recipe — from a photo, a link, or your own voice
- Get guided help cooking with your kids and share your cookbook with family anywhere
- Get ideas for what to cook from what's already in your fridge
Already have an account? Sign in